Garbage Disposal Installation in Malibu, CA
Serving Ventura & Sacramento Counties
Upgrading or adding a garbage disposal in your Malibu home improves kitchen convenience, supports entertaining, and helps keep sinks clear. In coastal communities like Malibu, unique factors such as older plumbing, septic systems, hillside drains, and corrosive salt air influence the right model selection and installation approach. This page explains how professional garbage disposal installation in Malibu, CA works, how to choose the right unit, what plumbing and electrical requirements to expect, step-by-step installation details, safety and maintenance recommendations, and simple troubleshooting for common disposal problems.
Why install a garbage disposal in Malibu homes
- Improved convenience for busy households and vacation rentals where quick clean up matters.
- Reduces sink clogs when used correctly by grinding food scraps before they enter the drain.
- Adds practical value to kitchen upgrades, particularly for homes that entertain frequently.
- For coastal properties, choosing corrosion-resistant materials helps extend service life in salty air.
Common types and model selection guidance
Selecting the right disposal for your Malibu home depends on household size, whether your property is on septic or sewer, and physical space under the sink.
- Continuous feed vs batch feed
- Continuous feed: Standard for most kitchens. Operates with a wall switch and is faster for general use.
- Batch feed: Requires a stopper or lid to operate. Safer around children and useful where splash control is a priority.
- Horsepower options
- 1/3 to 1/2 HP: Suitable for small households with light use.
- 3/4 HP: Best balance for most families; handles tougher scraps with fewer jams.
- 1 HP and above: Recommended for large families, heavy use, or frequent entertainment.
- Materials and features for Malibu
- Stainless steel grind components resist corrosion from coastal humidity and salt air.
- Anti-odor seals and sound insulation are helpful in open-plan coastal homes.
- Septic-compatible or macerating units may be required for homes on septic systems. Confirm septic suitability before purchase.
Plumbing and electrical requirements
Proper plumbing and electrical preparations are essential for safe, code-compliant installation.
- Plumbing
- Standard sink flange and mounting assembly sized to your sink. Undermount sinks may require specific flanges.
- Proper discharge piping and trap configuration. For hillside or long runs, confirm slope and venting to prevent slow drains.
- Dishwasher inlet: Many homes connect the dishwasher drain to the disposal. Ensure the knockout plug is removed and connections are watertight.
- Septic systems: Some Malibu homes use septic tanks or up-slope plumbing requiring a macerator pump instead of a conventional disposal. Check septic rules and permit requirements.
- Electrical
- Most disposals run on standard 120 V circuits. A dedicated circuit is preferred for higher horsepower units.
- Choose between corded plug-in models and hardwired units based on space under the sink and local code.
- Wall switch placement should be convenient and comply with electrical code. GFCI protection may be required in certain installations; local code inspection will determine exact needs.
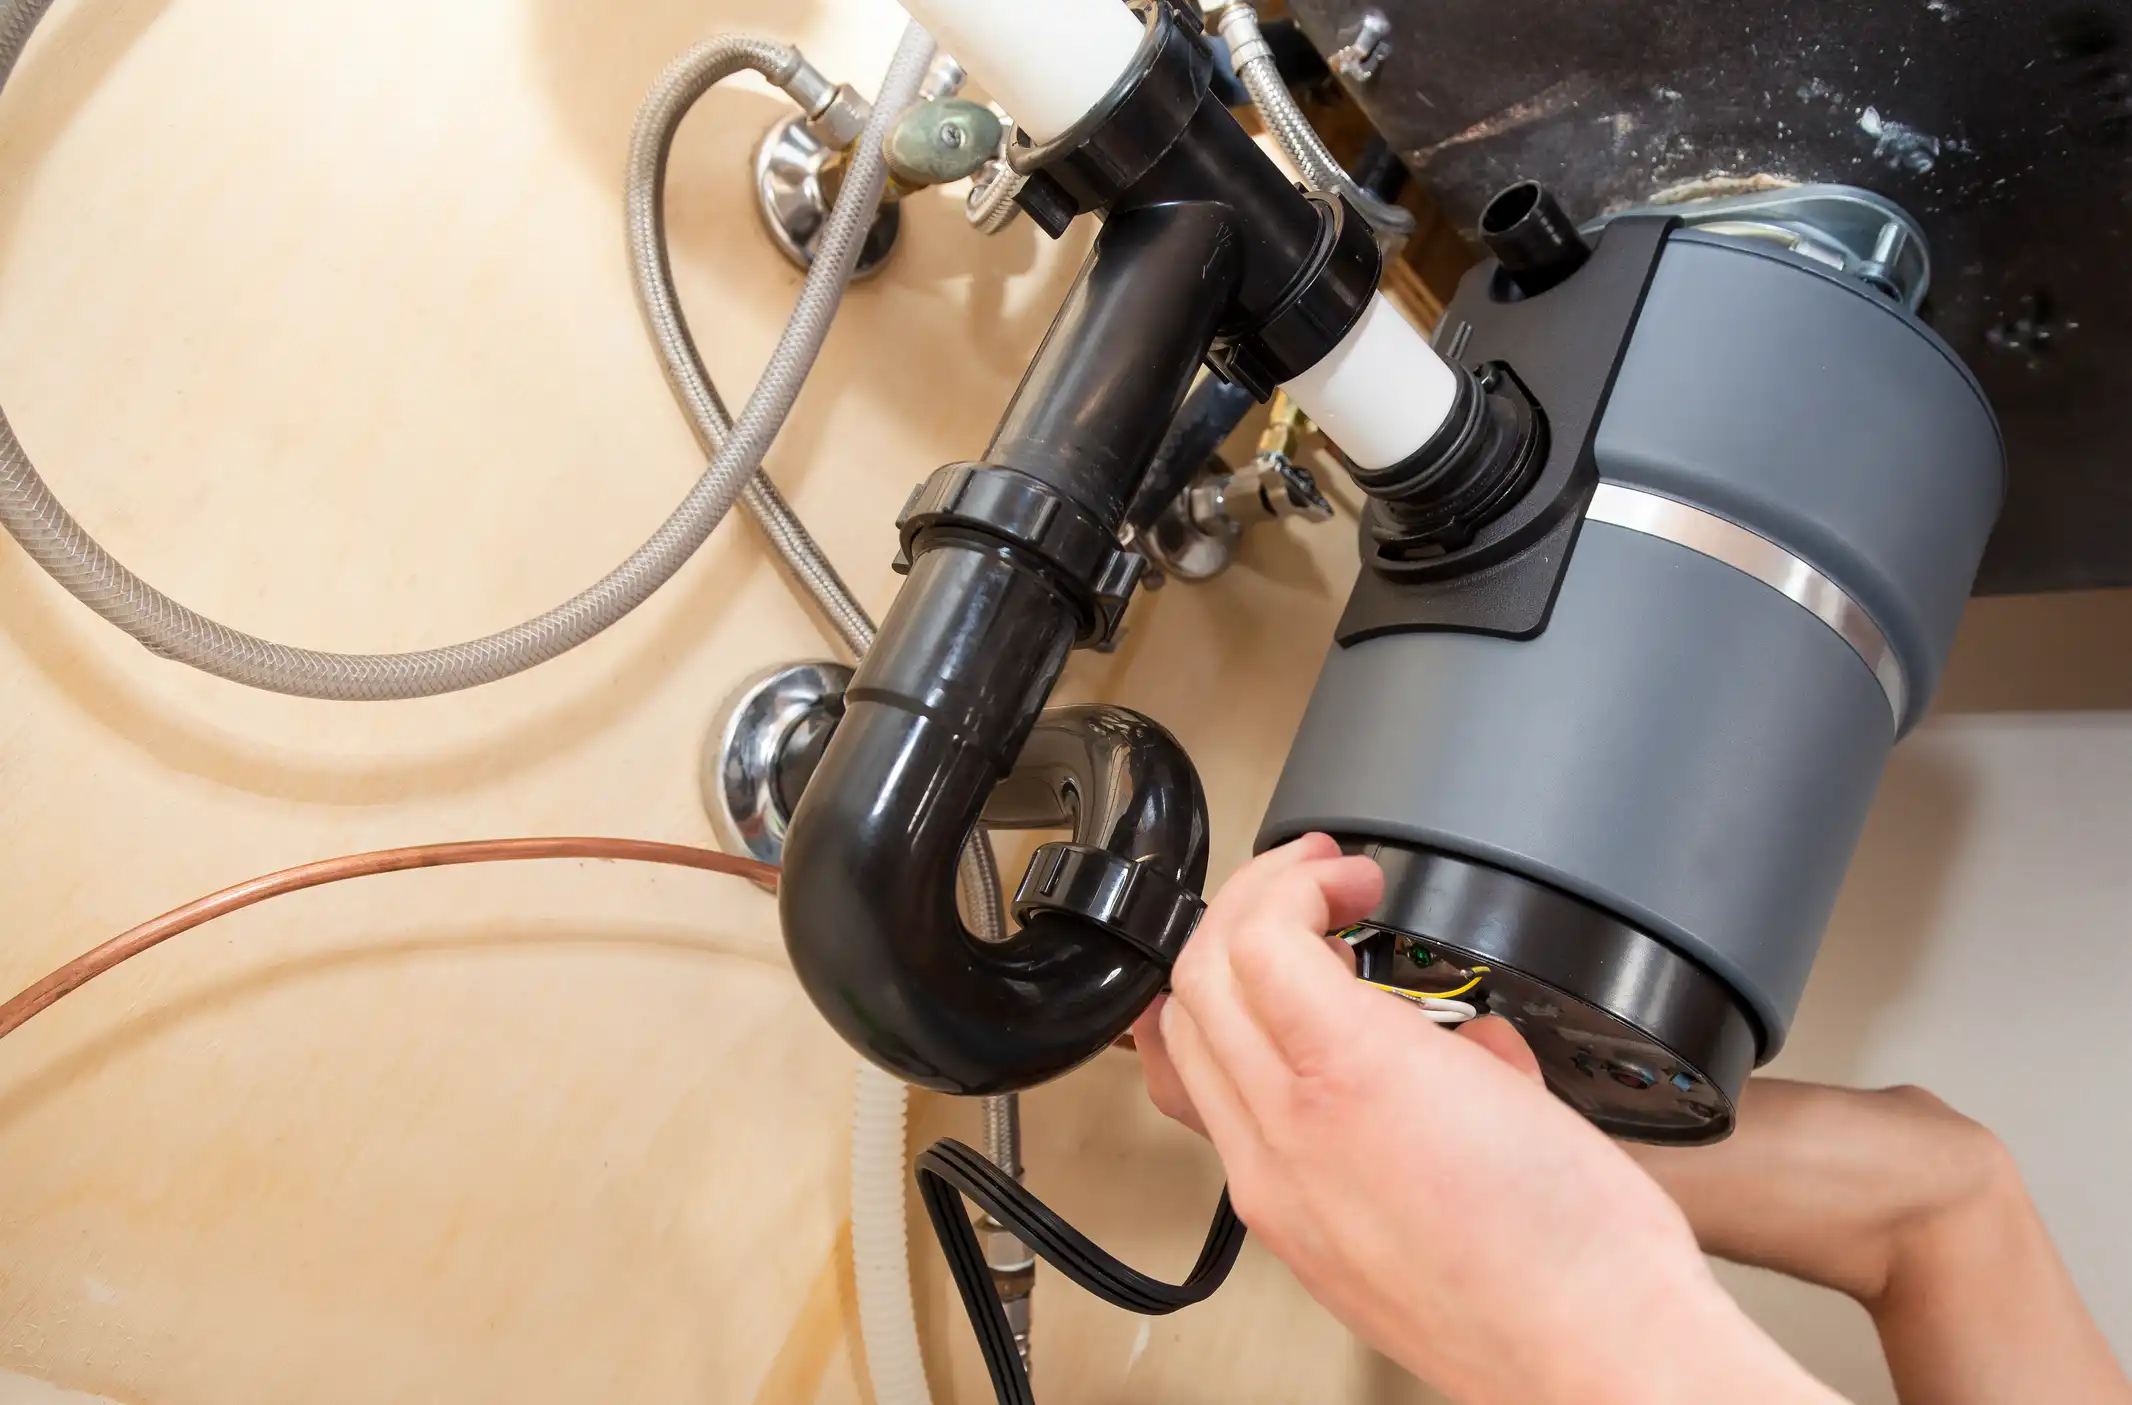
Professional installation steps
A professional installation ensures safety, correct fit, and long-term performance.
- Pre-install inspection
- Evaluate sink type, cabinet clearance, existing plumbing, dishwasher connections, and whether the home is on sewer or septic.
- Confirm electrical supply and switch location.
- Remove old unit (if present)
- Disconnect power and water connections, remove the old mounting assembly, and inspect sink flange and tailpiece for damage.
- Install mounting assembly and disposal
- Fit new sink flange and mounting ring. Secure the disposal to the mounting assembly per manufacturer instructions.
- Tighten mounting hardware and align the unit to avoid stress on piping.
- Plumbing and dishwasher hookup
- Attach the discharge elbow to the disposal and connect to P-trap. Install dishwasher tailpiece if required.
- Verify proper slope and venting for reliable draining.
- Electrical connections
- Wire the disposal according to code if hardwired, or install a corded unit into a properly rated outlet.
- Install or connect to the wall switch and test power.
- Test and finish
- Run water, test disposal under load with soft food waste, check for leaks, and verify noise and vibration levels.
- Inspect all seals and re-tighten connections as needed.
Safety and maintenance tips for Malibu residents
- Run cold water while operating the disposal and for 15 seconds afterward to flush ground particles through the trap.
- Avoid grease, large bones, fibrous foods (corn husks, celery), coffee grounds in large amounts, fruit pits, and expandable foods like pasta and rice.
- Use small quantities of soft scraps at a time. Overloading is the most common cause of jams.
- Monthly maintenance: grind ice cubes to clean impellers and flush with cold water. A small amount of citrus peels helps control odors.
- For deodorizing, use cold water and a handful of citrus or a cup of ice and a small amount of kosher salt. Avoid harsh chemical cleaners which can damage seals and plumbing.
- Inspect for leaks and corrosion periodically, especially in coastal homes where salt air accelerates wear. Stainless steel components and marine-grade mounting hardware extend life.
Troubleshooting common garbage disposal problems
- Disposal does not start: Check the reset button on the unit. If that does not work, verify the circuit breaker and wall switch. Persistent power issues require a licensed electrician.
- Humming but not grinding: This often indicates a jam. Turn power off and use the provided hex wrench at the bottom flywheel to free the impeller. Do not put hands inside the unit.
- Frequent clogs or slow draining: Ensure proper trap and vent configuration. Large or fibrous wastes can cause buildup. A professional inspection can identify piping issues or incorrect slopes common in older Malibu plumbing.
- Leaks under the sink: Leaks may arise from loose mounting hardware, a damaged sink flange, or failing seals. Small leaks might be tightened, but corrosion or cracks typically require part replacement.
- Strong or persistent odors: Regularly grind citrus peels, run cold water, and clean the splash guard. If odors persist, the trap may be holding residue or a leak could be allowing sewer gas entry.
Garbage disposal installation in Malibu, CA is best handled with attention to local plumbing conditions, septic status, and environmental factors like salt air. Choosing a model with appropriate horsepower, stainless components, and septic compatibility protects performance and longevity. Professional installation ensures safe electrical connections, correct plumbing, and compliance with local codes to prevent recurring problems. Proper use and routine maintenance keep your disposal working reliably for years, making kitchen cleanup faster and less stressful.
Schedule Expert Garbage Disposal Installation in Malibu
A reliable garbage disposal makes everyday kitchen cleanup easier, but in Malibu’s coastal conditions you need installation that accounts for salt air, older plumbing, and septic or hillside drainage systems. With AirWorks Heating Air Plumbing, you get expert guidance on the right unit, proper hookups, and long-term protection against leaks and corrosion.
Upgrade your kitchen with confidence—schedule your garbage disposal installation in Malibu, CA today and enjoy smoother, worry-free performance for years to come

Financing for Your AC, Heating, or Plumbing needs, Big or Small!
Hear What Our Satisfied Clients Have To Say