Smart Thermostat Installation: Easy 1-Hour Guide

Why Upgrade to a Smart Thermostat?
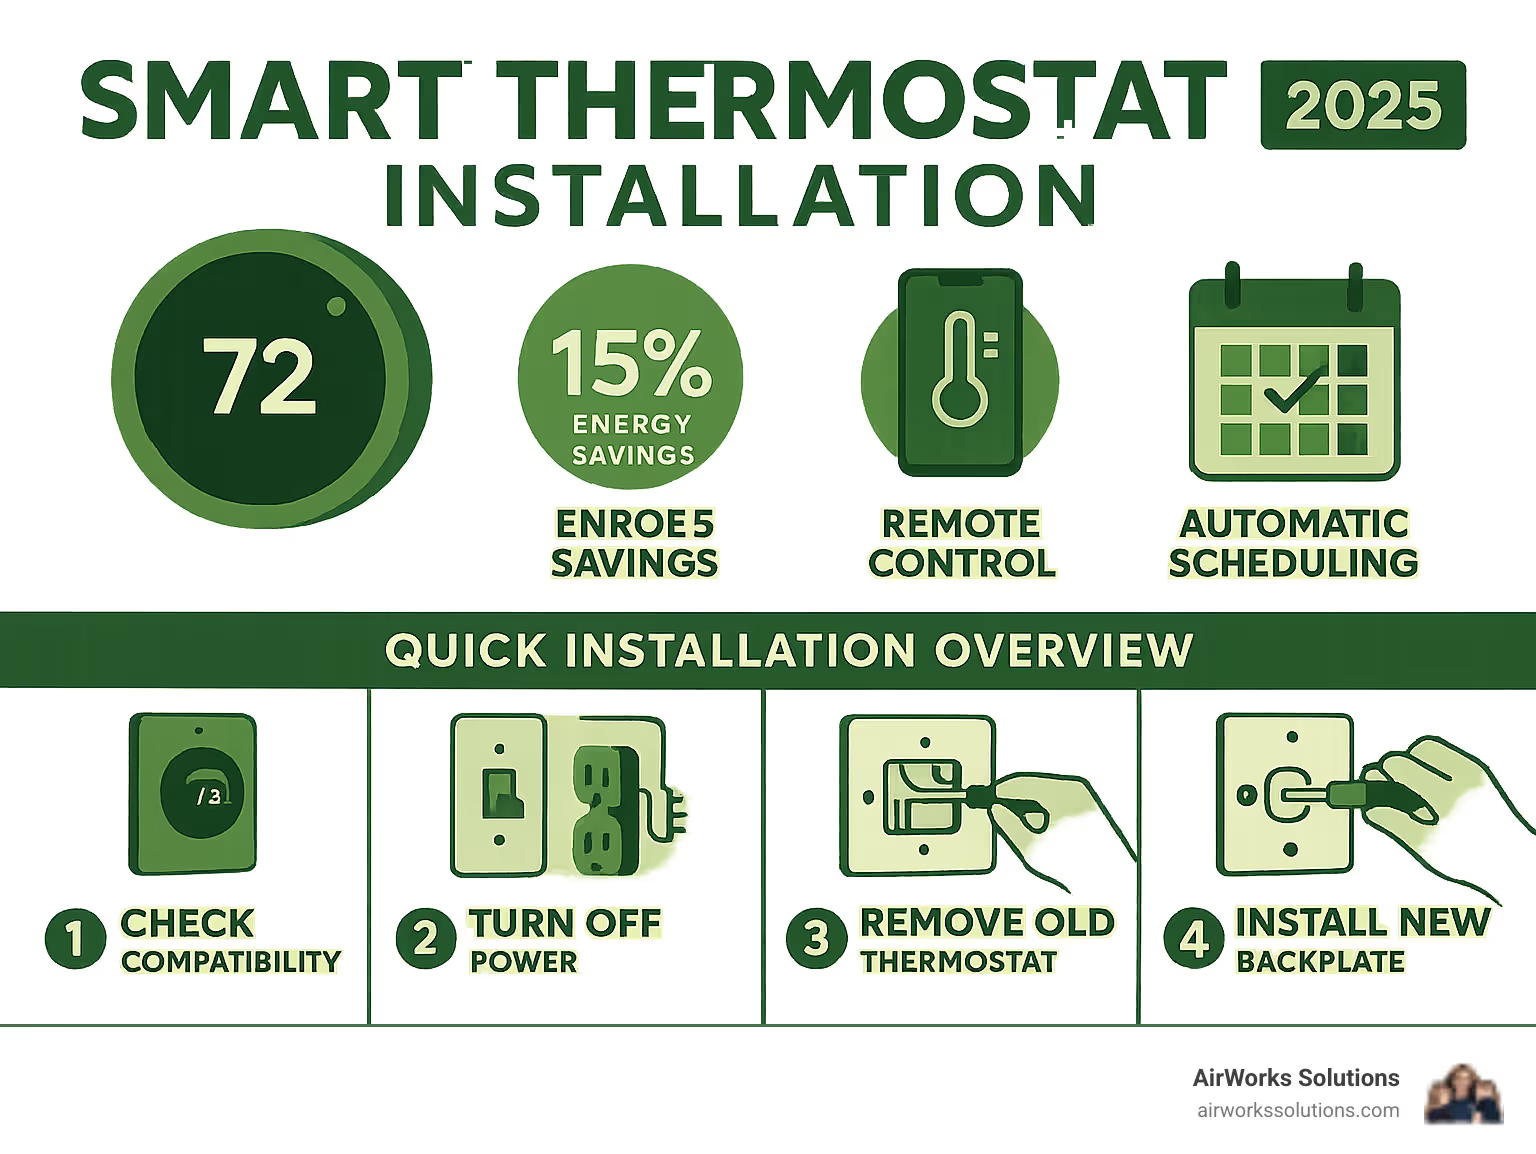
Smart thermostat installation can save you up to 15% on heating and cooling costs while giving you complete control over your home's comfort from anywhere. Most homeowners can complete this upgrade in just 45-60 minutes with basic tools.
Quick Smart Thermostat Installation Overview:
- Check compatibility - Ensure your HVAC system works with smart thermostats
- Turn off power - Switch off HVAC breaker for safety
- Remove old thermostat - Take photos of wiring first
- Install new backplate - Mount securely and level
- Connect wires - Match labeled wires to correct terminals
- Setup and configure - Connect to Wi-Fi and download app
Smart thermostats offer significant advantages over traditional models. They learn your schedule, automatically adjust temperatures when you're away, and provide detailed energy reports. Unlike basic programmable thermostats that require manual programming, smart models adapt to your lifestyle.
The installation process involves working with low-voltage wiring, making it a manageable DIY project for most homeowners. However, you'll need to check if your system has a C-wire (common wire) for continuous power. If not, adapter kits are available.
Key benefits include:
- Remote temperature control via smartphone
- Energy usage tracking and reports
- Automatic scheduling based on your habits
- Integration with other smart home devices
For more complex HVAC setups or if you're uncomfortable with electrical work, consider professional Smart Home System Installation services.
Relevant articles related to smart thermostat installation:
Smart vs. Programmable Thermostats
It's helpful to understand what sets smart thermostats apart from programmable models. While both allow you to set schedules to save energy, smart thermostats offer a significant upgrade in functionality.
Programmable thermostats require you to manually set a fixed schedule for temperature changes. This offers more savings than a manual thermostat but lacks flexibility.
Smart thermostats use Wi-Fi to connect to your home network, enabling advanced features, greater flexibility, and automation.
Here's a quick comparison:
FeatureProgrammable ThermostatSmart ThermostatLearning AbilityNoneLearns habits, self-programs over timeRemote AccessNoneControl via smartphone app from anywhereEnergy ReportsNoneProvides detailed energy usage data and insightsGeofencingNoneAdjusts temperature based on your phone's locationSchedulingBasic, manual input requiredAdvanced, adaptive, and automatic schedulingSmart Home IntegrationNoneConnects with voice assistants (Alexa, Google Home) and other smart devicesSensorsBasic temperature sensorOccupancy, humidity, external weather data, etc.UpdatesManual/NoneOver-the-air firmware updates
A smart thermostat learns your preferences and routines, programming itself over time. This means less manual input and more effortless energy savings. They can also detect when you're away and automatically switch to an energy-saving mode.
Before You Begin: Preparation is Key
Proper preparation for your smart thermostat installation saves time and prevents headaches later. A little planning ensures you have everything you need before you start.
HVAC system compatibility is your first checkpoint. Most smart thermostats work with standard low-voltage systems, but older or specialized systems (like high-voltage electric baseboards) may not be compatible. Before buying, use the manufacturer's online compatibility checker. You'll input your current wiring details to confirm if the model will work for you.
Timing matters. Spring and fall are ideal for installation due to moderate temperatures. If you need to pause for troubleshooting, your home will remain comfortable.
Your thermostat location plays a bigger role in comfort than most people realize. The ideal spot gives an accurate reading of your home's average temperature. Skip areas near drafty windows, direct sunlight, or heat-producing appliances. A central interior wall usually hits the sweet spot.
Safety precautions are essential. We're dealing with electrical connections, even if they're low-voltage. Always turn off your HVAC system at the breaker before touching any wires. This simple step keeps you safe and prevents equipment damage.
For more complex HVAC situations or if you'd rather leave it to the pros, check out our comprehensive HVAC Services.
Tools and Materials You'll Need
Most smart thermostat installation jobs require only a few common household tools.
Your screwdriver will be your most-used tool. A multi-head version with Phillips and flathead options is ideal. Pliers are handy for maneuvering wires, while wire strippers might be needed for fresh copper exposure, though this is uncommon.
A level ensures your new thermostat looks professionally installed. Many smart thermostats include built-in leveling guides, but a separate level provides extra confidence.
Your smartphone is crucial for this project. You'll use it to photograph your old wiring, download the new thermostat's app, and complete the initial configuration.
Wall putty might be needed if your new thermostat is a different size than the old one, leaving marks or holes. Many thermostats include trim kits to cover these imperfections.
Don't forget masking tape or wire labels for marking your wires. This step is critical—you don't want to guess which wire goes where. Some smart thermostats include their own helpful labeling system.

Understanding the C-Wire
The C-wire (common wire) provides the continuous power smart thermostats need to run features like Wi-Fi and a backlit display. Unlike older models that used batteries or "borrowed" power, smart thermostats require a steady connection.
Why it's important: Maintaining a Wi-Fi connection, running a display, and learning your habits requires the continuous power that a C-wire provides via a 24-volt AC supply.
Checking for a C-wire: After turning off the power, remove your old thermostat's faceplate and look for a wire connected to the "C" terminal. Also, check for an unused wire tucked into the wall. If you don't find one, check your HVAC system's control board (in the furnace or air handler) for a "C" terminal with a wire running toward the thermostat.
No C-wire? C-wire adapter options are available. These include power extender kits that use existing wiring, add-a-wire kits, or external adapters that plug into a wall outlet.
For detailed guidance on connecting your home to the digital age, explore our WiFi Thermostats services.
Preparing for Your Smart Thermostat Installation
These final steps ensure a smooth installation.
Check compatibility online one last time with your specific wiring. Turn off power at the breaker—this is your most important safety step. Go to your electrical panel and flip the breaker for your HVAC system. Take a photo of old wiring before disconnecting anything. This photo is your roadmap. Label wires with stickers using the terminal letters (R, Y, G, C, etc.). Wire colors are not standardized; the letter codes are what matter!
Taking these preparation steps seriously transforms your smart thermostat installation from a potentially stressful experience into a smooth, confident upgrade to your home's comfort system.
Your Step-by-Step Guide to Smart Thermostat Installation
With the preparation done, the smart thermostat installation is a manageable DIY project due to the low-voltage wiring. Follow each step carefully for a successful installation. For other heating and cooling needs, we offer comprehensive More info about Heating and Cooling Services.
Step 1: Power Down and Remove the Old Thermostat
This step protects you and your HVAC system from electrical mishaps.
Turn off your HVAC breaker at the main electrical panel to cut power at the source. Confirm the power is actually off by trying to adjust the old thermostat; nothing should happen. Remove the old faceplate, which usually pops off with a gentle pull. Remove the old backplate by first disconnecting each labeled wire, then unscrewing the plate from the wall. Keep the old thermostat as a backup.
Step 2: Label Wires and Install the New Backplate
This is where your careful preparation pays off.
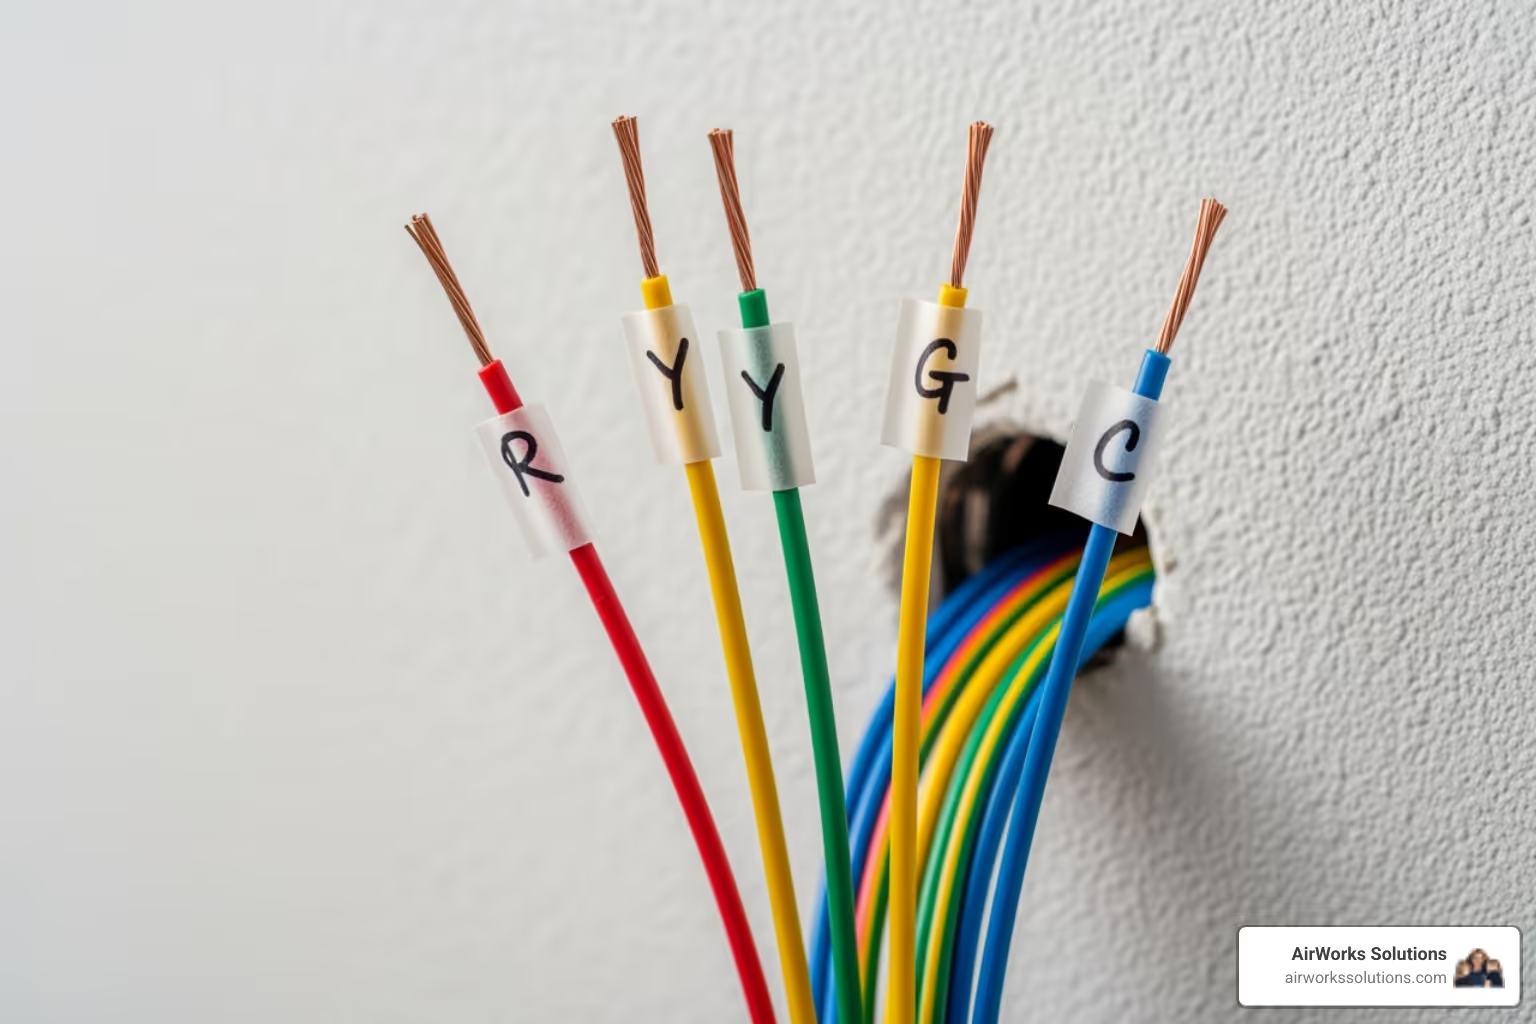
Match your wire labels to the terminals on the new backplate. Secure those wires temporarily with tape so they don't fall back into the wall. Mount the new backplate by threading the wires through the center opening. Use your level to ensure it's straight, then mark and drill your screw holes before securing it to the wall.
Step 3: Connect Wires and Attach the New Thermostat
This final step brings your new smart thermostat to life.
Connect each labeled wire to its matching terminal on the new backplate, ensuring a secure connection. Tuck any excess wire back into the wall opening. To prevent drafts from affecting temperature readings, you can stuff a small amount of insulation into the opening around the wires. Attach the new faceplate; it should snap into place easily. If it doesn't, check that no wires are obstructing it. Restore power at the breaker. Your new thermostat should power on.
The Final Touches: Setup and Troubleshooting
You've completed the physical smart thermostat installation. Now it's time to connect it to your network and configure the smart features. This final stage brings your new device to life. For even more advanced climate control, consider exploring More info about Zoning Systems.
Initial Setup and Configuration
Your thermostat will guide you through the initial setup.
Connect to Wi-Fi by selecting your home network (use the 2.4GHz band if available) and entering the password. Follow on-screen prompts to set the date, time, and confirm your HVAC system type. Download the companion app on your smartphone, create an account, and link it to your thermostat.
Set your temperature preferences and explore app features. Explore options like custom scheduling, adaptive learning features, location-based geofencing, and detailed energy reports. You can also set up integration with voice assistants like Alexa or Google Home. Finally, test both the heating and cooling functions to ensure everything is working correctly.
For a complete approach to your home's environment, including both temperature and air quality considerations, check out our More info about Indoor Air Quality services.
Risks and Challenges During Smart Thermostat Installation
While smart thermostat installation is straightforward, some issues can arise. Knowing what to look for can save time.
Thermostat won't turn on: Check that the HVAC breaker is fully on. Verify all wire connections are secure and match your photo. Ensure the furnace cover panel is closed properly, as this often engages a safety switch. A short circuit during installation may have blown a small fuse on the furnace control board.
Non-standard wiring: Wire colors are not always standard. Rely on the terminal letters (R, Y, G, C) from your labels and photo. Consult the manufacturer's guide if your old and new terminals don't match.
Blown fuse: This can happen if live wires touch. Always turn off the breaker first. If a fuse is blown, replace the small fuse on your HVAC control board with an identical one.
Wall damage: If the new thermostat is a different size, use the included trim plate to cover old marks or holes. If one isn't included, wall putty and touch-up paint can fix imperfections.
When to call a professional: Contact a professional for high-voltage wiring (120V/240V), complex HVAC setups (multi-stage, dual-fuel), or if you're uncomfortable installing a C-wire adapter or troubleshooting issues. The experienced team at AirWorks Heating Air Plumbing can ensure a safe and correct installation.
Frequently Asked Questions about Smart Thermostats
Here are answers to the most common questions homeowners have about switching to a smart thermostat.
How long does a typical smart thermostat installation take?
A typical DIY smart thermostat installation takes about 45 to 60 minutes, assuming your system is compatible and you have the tools ready. Installing a C-wire adapter may add another 15-30 minutes, but it's still a manageable project for an afternoon.
What is the average lifespan of a thermostat?
Most thermostats last 10 to 15 years. However, you don't need to wait for your old one to fail. Upgrading to a smart model provides immediate benefits like energy savings, remote control, and usage reports, much like upgrading from an old phone to a smartphone.
Can I replace my old thermostat with a smart one?
Yes, most likely. The vast majority of homes with standard low-voltage systems (24V), like central heating and cooling, can be upgraded. The key is to check compatibility first, especially regarding the C-wire. Homes with high-voltage (line-voltage) systems, like electric baseboards, require specific smart thermostat models. Always use the manufacturer's online compatibility tool with a photo of your current wiring before you buy.
Conclusion: Enjoy Your Smarter, More Efficient Home
Congratulations on completing your smart thermostat installation! You've made a significant upgrade to your home's efficiency and convenience.
This upgrade offers more than just a new gadget; you can now enjoy potential energy savings of up to 15% and the ability to adjust your home's temperature from anywhere. What may have seemed complex is a manageable DIY project that improves comfort and control. By following the steps—checking compatibility, ensuring safety, and labeling wires—you've enabled your thermostat to learn your habits, save energy, and provide valuable insights.
However, not every installation is straightforward. If you encountered complex wiring, have a specialized system, or simply feel unsure about the process, the experienced professionals at AirWorks Heating Air Plumbing are here to help. Since 2010, we've provided homeowners in the greater Sacramento area with expert assistance.
We can ensure a safe and correct installation, giving you peace of mind that your new thermostat is performing optimally. Sometimes, a professional touch is the best choice for your home's comfort and safety.
Ready to optimize your home's climate control? Learn more about our Thermostats services and find how we can help you get the most from your smart home.

