Ductless Mini Split Installation Carpinteria, CA
Serving Ventura & Sacramento Counties
Ductless Mini Split Installation Carpinteria, CA
Ductless mini split installation in Carpinteria, CA provides an efficient, flexible solution for homes that lack ductwork or need targeted comfort control. Coastal living here brings mild temperatures but also marine humidity and salt air that can shorten the life of traditional HVAC equipment. A properly designed and installed mini split delivers precise heating and cooling, lower operating costs, and the ability to create separate comfort zones for bedrooms, living areas, or additions without invasive ductwork.
Why a mini split makes sense for Carpinteria homes
- Coastal climate with moderate heating load and frequent mild cooling demand favors heat-pump based mini splits for year-round efficiency.
- Many older or beach-area homes do not have ducts or have restricted attic space, making conventional split systems impractical.
- Multi-zone capability helps address uneven temperatures caused by sun exposure on west- and south-facing walls common in residential layouts near the ocean.
- Salt air exposure requires equipment selection and installation practices that resist corrosion and ensure long-term reliability.
Common mini-split installation types and issues in Carpinteria
- Single-zone systems for small rooms, garage conversions, or accessory dwelling units.
- Multi-zone systems (2 to 8+ indoor units) for whole-home comfort with individual room control.
- Typical issues homeowners face: undersized units that struggle on hot afternoons, poor indoor unit placement causing drafty spots, refrigerant leaks from improper line installation, and premature outdoor unit corrosion from salt spray.
Site evaluation, load sizing, and multi-zone design
A successful installation starts with a detailed site evaluation and accurate sizing:
- Conduct a load calculation (Manual J principles) that accounts for Carpinteria-specific factors: coastal breezes, sun exposure, window orientation, insulation levels, and occupancy patterns.
- Determine how many indoor heads are needed and which style fits each room—wall-mounted, low-profile floor console, ducted short-run, or ceiling cassette—based on aesthetics and air distribution requirements.
- Design the multi-zone layout so each head’s capacity matches the room load rather than simply splitting outdoor unit capacity across rooms. Proper zoning prevents short cycling and maintains efficiency.
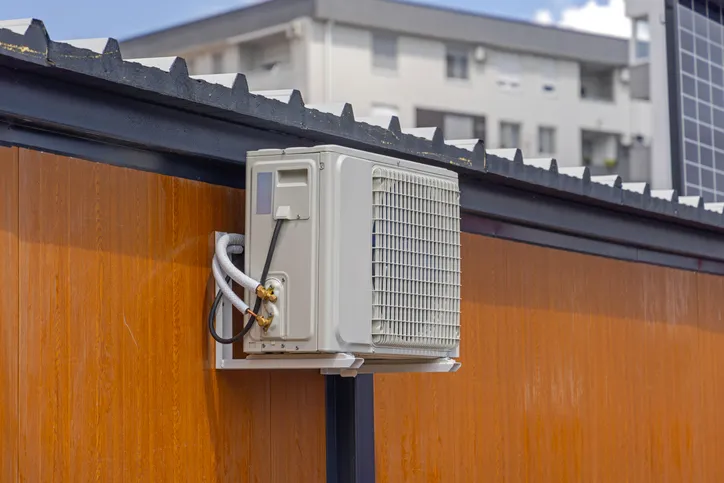
- Evaluate outdoor unit location for minimal salt exposure, good airflow, and accessible service space. Elevating the unit and using corrosion-resistant mounts is often advisable in Carpinteria.
Equipment options and selection criteria
Choose equipment with features suited to coastal Southern California:
- Inverter-driven variable-capacity heat pumps deliver smooth, efficient performance and better humidity control in mild climates.
- Look for higher SEER and HSPF ratings for reduced energy use; higher-efficiency units typically cost less to operate over time.
- Select outdoor units with corrosion protection or coated coils to resist salt air damage. Stainless or coated mounting hardware and sacrificial anodes for brackets can extend service life.
- Consider integrated smart controls and zoning thermostats that let occupants schedule and adjust individual spaces for comfort and energy savings.
Step-by-step installation process
A professional installation follows methodical steps to protect performance and longevity:
- Pre-install site survey and system design confirmation.
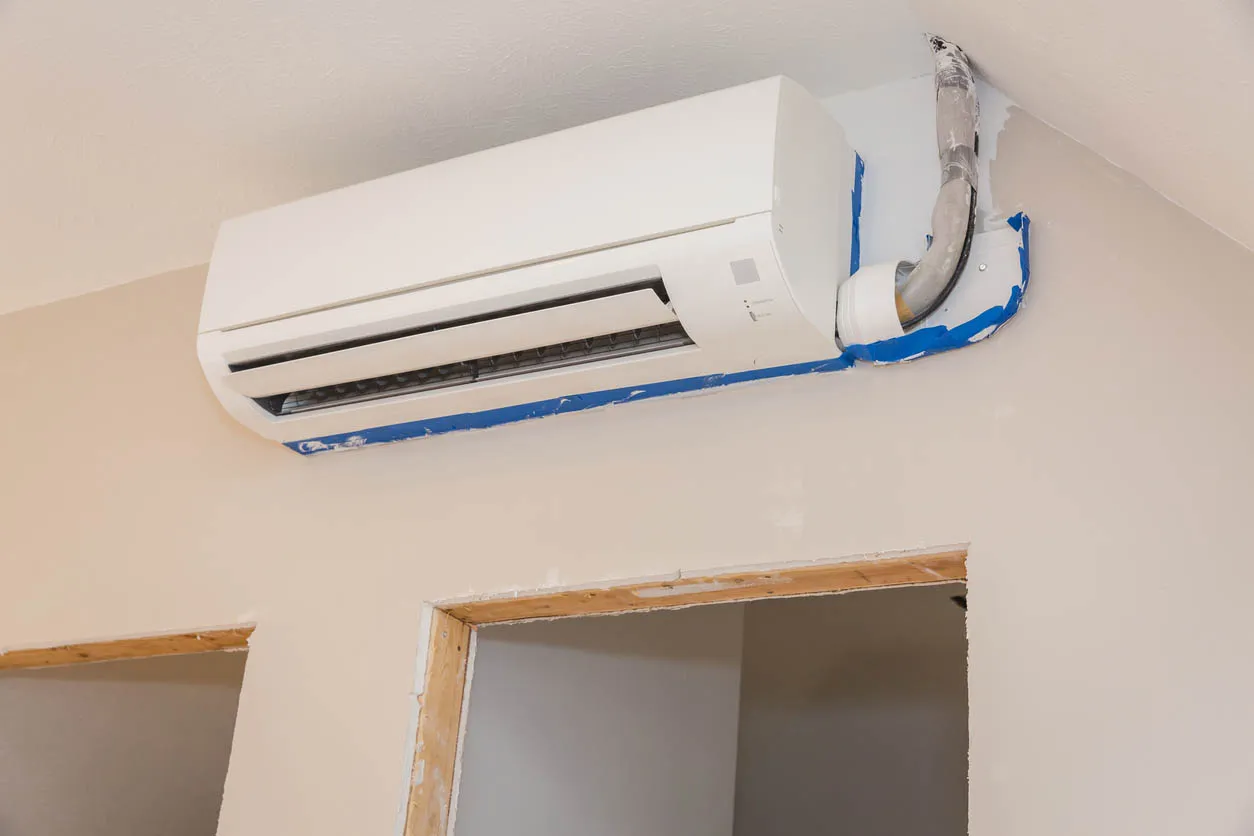
- Mount the indoor units: secure wall brackets or ceiling/cassette supports in planned positions for optimal airflow and clearance.
- Set up the outdoor unit on a raised pad or vibration-isolating stand positioned for service access and reduced salt exposure.
- Route refrigerant lines, condensate drain, and communication wiring through a small, sealed penetration to the interior—minimizing visual impact and future air leakage.
- Connect and braze refrigerant lines or use factory flared/pre-charged line sets as specified by the manufacturer; evacuate the system with a vacuum pump and verify required vacuum level.
- Make electrical connections: dedicated circuit, properly sized breaker, and a disconnect per code. Ensure all wiring follows local electrical code and manufacturer specifications.
- Pressure test for leaks, charge refrigerant if necessary, and run the system through start-up procedures to confirm pressures, superheat/subcooling, and airflow.
- Calibrate controls, pair remote or app-based thermostats, and demonstrate operation for occupants.
Electrical and refrigerant requirements
- Most mini split outdoor units require a dedicated 208/230V circuit with appropriate breaker size and an external disconnect. The specific amperage depends on the outdoor unit model and number of indoor units.
- Refrigerant types in current systems include R410A and R32; handling and charging must be performed by technicians certified under EPA Section 608. Accurate vacuuming and leak checking are critical to protect performance and comply with regulations.
- Local permits and inspections are typically required; installations must meet California mechanical and electrical codes as enforced by Carpinteria and Santa Barbara County jurisdictions.
Energy-saving benefits and comfort gains
- Zoning eliminates energy waste by conditioning only occupied rooms, which often translates to lower monthly utility bills in Carpinteria’s mild climate.
- Variable-speed compressors maintain consistent indoor temperatures, reduce humidity swings, and avoid the energy costs of frequent on/off cycling.
- Mini splits preserve indoor air quality by reducing the pathways for dust and contaminants associated with leaky ductwork.
- Properly sized and installed systems deliver faster comfort recovery and quieter operation than many older packaged systems.
Post-installation testing and occupant instruction
After installation, comprehensive testing and clear homeowner instruction finalize a reliable system:
- Perform full performance checks: airflow, temperature differentials, refrigerant pressures, electrical draw, and safety controls. Document results for future maintenance.
- Walk occupants through normal operation: adjusting zones, scheduling, remote or app features, and energy-saving settings. Explain how the system prioritizes zones if outdoor capacity is limited.
- Demonstrate filter removal and recommended cleaning frequency. Provide guidance on safe outdoor unit clearance, protecting the unit from direct salt spray and heavy vegetation, and seasonal checks.
- Recommend routine maintenance: filter cleaning, condensate drain inspection, and annual professional check that includes coil cleaning, electrical inspection, and refrigerant verification to maintain warranty and efficiency.
Properly executed ductless mini split installation in Carpinteria, CA transforms comfort, lowers energy use, and provides reliable year-round heating and cooling suited to coastal living. Thoughtful system design, corrosion-aware equipment choices, and meticulous installation and testing are the keys to long-term performance in this region.
Upgrade Comfort with a Ductless Mini Split in Carpinteria
Transform the way you cool and heat your home with professional ductless mini split installation from AirWorks Heating Air Plumbing. Our team designs systems that stand up to coastal conditions while delivering quiet, energy-efficient comfort. Take advantage of flexible Financing options to make your upgrade affordable, and protect your investment with a tailored Maintenance Plan that keeps your system running like new. Call today to schedule your consultation and experience personalized comfort that’s built to last in Carpinteria’s unique climate.

Financing for Your AC, Heating, or Plumbing needs, Big or Small!
Hear What Our Satisfied Clients Have To Say